Star News


Bandage on the brush: overlay technique
Desmurgy is the doctrine of bandaging. The basics of desmurgy should be known not only by medical personnel, but also by the layman. This knowledge will help to provide effective first aid to the wounded with bleeding, after burns, injuries, victims with fractures. This article will talk in detail about the rules for applying bandages to the brush and their features.
Types of bandage fixation
Before proceeding with the description of the technique of applying bandages to the hands, it is necessary to understand what types of fixation of the bandage are in general. After all, an effective bandage is one that is securely fastened. This is especially true for bandaging the brush. After all, this is the most mobile part of the human body, which consists of many small bones. Therefore, to ensure its complete immobility is quite difficult.
The main types of fixing bandages on the hand are presented in the table below.
| Bandage fixation type | Peculiarities |
| patch | This type of dressing is used for small wounds, fractures of the ribs, is applied to the edges of the granulating wound to approximate its edges. It is also used in the postoperative period when reducing hernias. The patch is applied directly to the edges of the wound with a sticky side. Pre-wound treated with alcohol or iodine |
| Zinc gelatin | Superimposed with varicose veins of the lower limb to provide permanent pressure. For its imposition, a special mass is prepared from gelatin, glycerin and zinc oxide. A paste is formed, which is abundantly lubricated with the skin of the lower extremities, and a bandage is applied on top in several rounds |
| Cleol | It is indicated for the same pathological conditions as the patch. Gauze folded in several layers is placed on the wound, and the skin around is smeared with cleol. After it dries, another layer of gauze is placed on top and pressed tightly against the skin. Due to the presence of cleol, the bandage adheres more firmly to the skin |
| collodion | According to the principle of imposition, it is similar to a cleol bandage. Only collodion is used instead of cleol |
| With rubber adhesive | Rubber glue is smeared on top of an already applied bandage dressing to protect it from exposure to liquids. It is especially advisable to use rubber glue in infants to prevent urine from entering the dressing and wound. |
| kerchief | A scarf is a triangular piece of fabric that is folded diagonally. The two corners on the sides are called the ends, the long side is the base, and the corner opposite it is the top. It is important to know these terms when studying the technique of bandaging a hand like a scarf. Most often, this type of bandage is used specifically for hanging the arm. |
Types of bandages
The imposition of bandage dressings in case of injury to the hand can be carried out according to the following types of bandaging:
- circular, or circular;
- spiral;
- creeping;
- criss-cross;
- spiky;
- turtle;
- returning.
The circular principle is the simplest. It is used for bandaging both upper and lower extremities. When applying a circular bandage, each subsequent round should completely overlap the previous one. When bandaging the hand, this type of bandage is used to secure the bandage around the wrist. It is also used after applying pressure bandages to stop bleeding.
The spiral bandage is somewhat more complicated than the circular one. In this case, the new round of the bandage overlaps the previous half, forming a spiral. It is this type of dressing that is used for serious injuries to any part of the body (legs, arms, abdomen), since it can cover a large surface area.
A creeping bandage, like a spiral bandage, is a kind of circular bandage. When applying a bandage to the hand in this way, the new tour of the bandage does not overlap the previous one, but, on the contrary, lags behind the width of half the bandage. It is not advisable to use such a bandage in isolation for serious injuries, since it is very fragile. It is usually used to hold a dressing when a large area of the limb is injured. That is, it is superimposed on top of an existing dressing.
The crossing, or cruciform, bandage begins with a fixing circular tour. Subsequently, the tours of the bandage are repeated many times, forming a crossover over the affected part of the body. In shape, such a bandage resembles the number 8. At the same time, each new turn of the bandage should overlap the previous one by two-thirds. It is used to bandage moving structures (joints, foot, hand) or parts of the body that are irregular in shape (back of the head, chest, back of the neck).
Spike bandage begins with a fixing tour, then the bandage can gradually go down, then the bandage will be descending, or upward - ascending. At the same time, the bandage is crossed, and each new round closes the one that was in front of it by two-thirds. The bandage got its name due to the fact that in shape it resembles an ear.
May be convergent or divergent. This bandage is used for joint damage. It begins with a tour that fixes the bandage to the bandaged surface. Subsequent coils overlap each other on the flexion side of the joint, and fan out on the opposite side. If the bandage is divergent, then it starts over the joint, and then the tours diverge from each other. If it converges, then the first round is applied outside the joint, and then the bandage is gradually brought closer to the center.
The returning bandage got its name, since the bandage constantly returns to the place where the bandage began. When such a bandage is applied to the fingers of the hand, there is a constant alternation of circular and longitudinal tours, which go sequentially until the bandaged surface is completely covered.
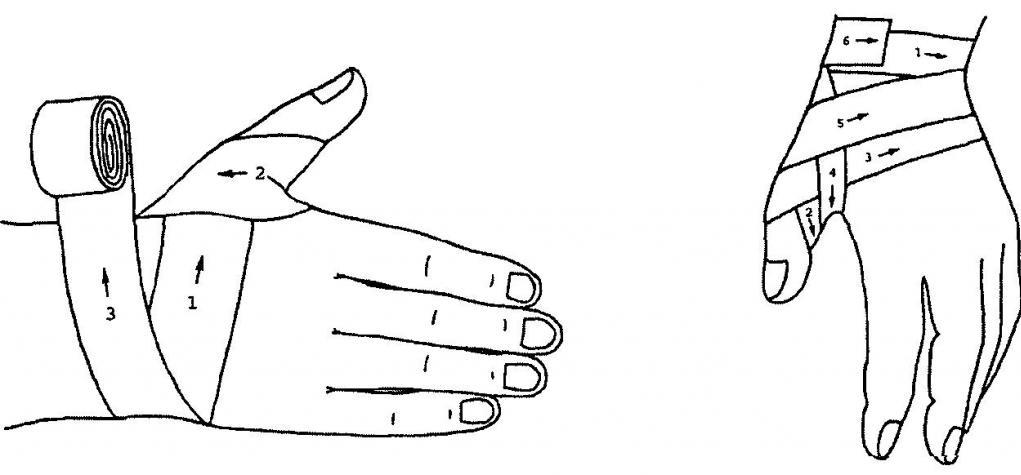
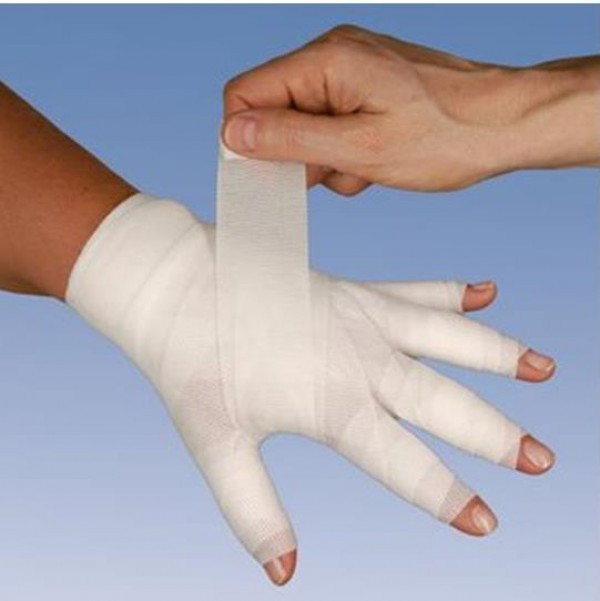
Bandage "mitten"
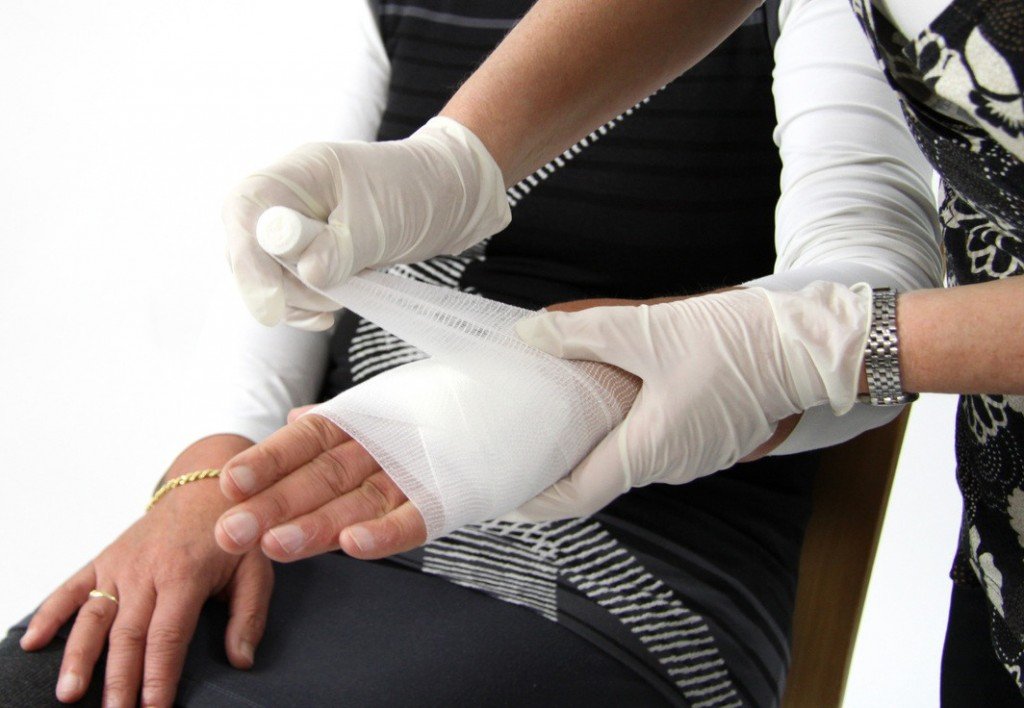
Before applying any bandage, you should calm the victim and explain to him the course of subsequent manipulations. To apply a bandage "mitten" on the brush, it is necessary to prepare scissors and a narrow bandage. For a good fixation of the bandage, you must perform the following steps:
- Make the first fixing move around the wrist, which is called the circular.
- Next, hold the bandage from the wrist to the tips of the phalanges of the fingers in a diagonal direction.
- Throw it over your fingertips and draw it in the opposite direction obliquely to your wrist.
- Make 2-3 strokes in a circular direction, gradually overlapping the brush.
- Again direct the bandage to the final phalanges in a diagonal direction, but this time change the direction of the bandage by making several circular moves in the transverse direction from the wrist to the hand and back.
- Bandage the first (thumb) finger of the hand.
- Secure the bandage with a few circular moves around the wrist.
- Cut off the bandage from the roll, cut the end and tie a knot.
When applying a "mitten" bandage to the hand, the patient or victim should sit opposite the person who is providing assistance. The forearm of the injured arm should lie on a table or other hard surface, and the hand should hang freely.
Bandage on one finger
A bandage on the hand with bandaging of one finger is used for wounds or burns of the phalanx. To apply it, you will need a bandage 5 cm wide and more than 2.5 cm long and scissors. The position of the victim should be the same as in the previous case: facing the one who provides assistance, with the hand hanging freely. The beginning of the bandage is taken in the left hand, and the tip in the right.
The application of a bandage to the finger of the hand is carried out in the following sequence:
- The first two fixing rounds are made circularly around the wrist joint, similar to the "mitten" bandage.
- Next, you need to hold the bandage towards the injured finger.
- Bandaging the finger begins from the more proximal to the more distal, that is, from the base to the tip of the finger. And this is done with spiral moves around the finger.
- After the finger is completely bandaged, the bandage is led along the back of the hand in a diagonal direction to the wrist joint. Thus, at the base of the finger, the bandage should cross with the previous round.
- The bandage is fixed with 2-3 circular rounds on the wrist joint.
- At the end, the bandage is cut off, its end is cut in two and tied into a tight knot.
Also, for bandaging one finger, you can use the returning type of bandage or spike-shaped.
Reversible finger bandage
The return bandage is applied to the hand when the patient is turned to face, the forearm is fixed on a hard surface, and the hand hangs freely from it. The dressing is applied as follows:
- By analogy with other types of bandages on the hands, the first few fixing tours have a circular direction and are applied around the wrist joint.
- Next, the bandage is led along the back surface of the hand to the injured finger.
- The bandage is brought to the tip of the finger.
- They bend around the finger with a bandage, transferring it to the palmar surface. Bring to the base of the finger, then, holding, again lead the bandage to the tip of the finger, throwing it to the back of the hand. With the other hand, hold the bandage on the palmar surface so that it does not fly off.
- They bandage with a creeping type to the tip of the finger, and then in the opposite direction, like a spiral.
- On the back of the hand, the bandage is led in a diagonal direction to the wrist joint.
- Fix the bandage on the joint with circular tours.
- Cut off the end of the bandage, cut it in two and tie it into a knot.
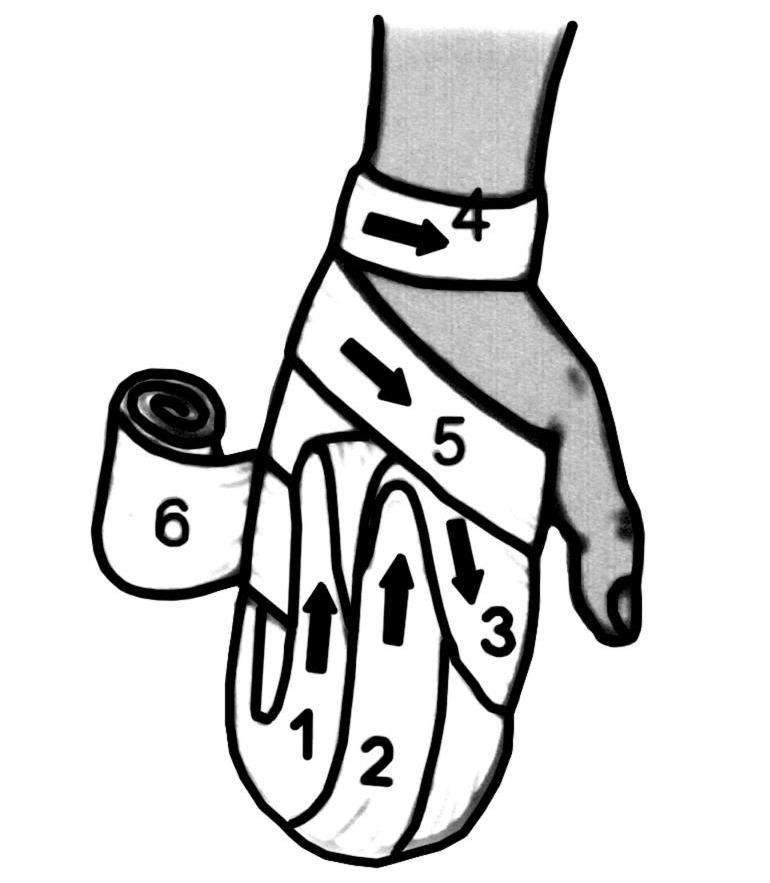
Thumb bandage
The beginning of applying a spica bandage to the hand is similar to all other types: turn the patient towards you, ensure free hanging of the hand, start applying with circular tours around the wrist joint. Differences begin after these fixing rounds. Next, you need to apply a bandage on the brush as follows:
- Draw a bandage along the back of the hand to the base of the first finger.
- Bring the bandage to the tip of your finger.
- Circle the thumb from the surface of the palm and the back of the hand.
- Again hold the bandage to the wrist.
- Make another tour around the wrist joint.
- Repeat the tours in the same way, each time moving to the back of the hand and securing the bandage around the wrist.
- The previous round on the finger should be covered halfway each time until the finger is completely bandaged.
- This bandage on the hand, like the previous ones, ends with fixing tours around the wrist joint.
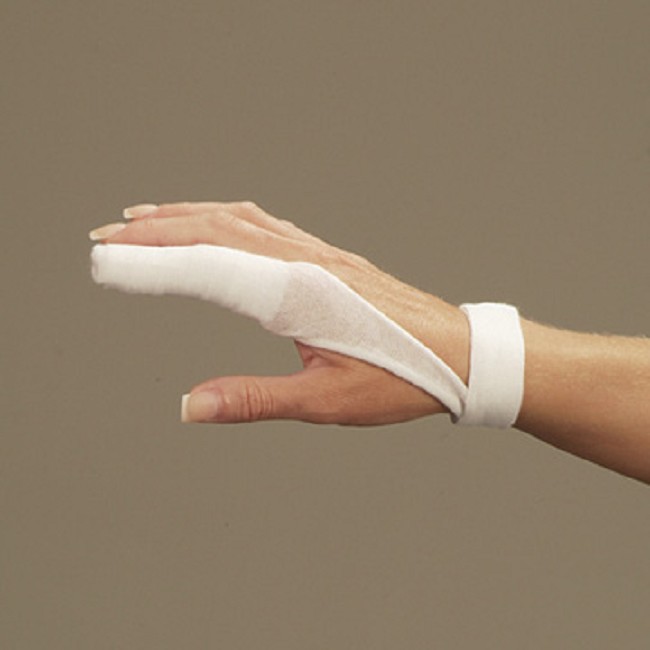
kerchief bandage
It is widely used in first aid due to its simplicity and availability of dressings. It is most advisable to use a kerchief bandage on the hand for fractures of the bones of the wrist or phalanges of the fingers. This bandage will provide peace to the hand until the arrival of the ambulance, when health workers can provide more qualified assistance using special materials.
For a scarf, you can use any material: a scarf, a large scarf. The main thing is that when it is folded, it should be triangular in shape. The long side is called the base, the two corners next to it are the ends, and the corner opposite the base is called the apex.
To apply a kerchief bandage, the base is directed towards the forearm. The top is wrapped with fingers from the palmar to the back of the hand to the forearm. The ends are tied around the wrist. Be careful not to tighten too tightly, as this will overtighten the hand and dislodge broken bone fragments.
You can also bandage with a tie. To do this, it is folded like a tie. The middle is laid on the palm, the ends are crossed on the back surface and transferred back to the palmar part of the brush. Here it is fixed.
Bandage "glove"
When applying a bandage to the hand, the "glove" of the patient is laid facing him. The forearm is fixed on a hard surface, the hand hangs freely from the table. The beginning of the bandage is taken in the left hand, the end of the bandage in the right. Bandaging is carried out clockwise. For good fixation of the bandage and its effectiveness, it is necessary to apply a bandage as follows:
- Make 2-3 circular tours around the wrist joint. They will fix the bandage around the bandaged surface.
- Pass the bandage to the base of the fingers along the back of the hand. Important! When fixing the right hand, bandaging should begin with the thumb, the left hand - with the little finger.
- Place a bandage under the first or fifth finger, respectively, of the hand being bandaged.
- With a spiral type of bandaging, hold the bandage from the base to the tip of the finger, and then back. Make sure that each subsequent round overlaps the previous one by two-thirds. So the bandage will sit securely on the finger.
- Return to the base of the finger with the same spiral tours.
- Draw a bandage from the base of the finger along the back of the hand to the wrist, making a cruciform tour.
- On the wrist, hold the bandage circularly and again go along the back of the hand to the base of the next finger.
- Bandage the next finger with spiral moves similarly to the previous one.
- Repeat steps 4, 5 and 6 until all fingers are bandaged.
- Like other bandages on the hand, this one is fixed with circular tours on the wrist joint.
cruciform bandage
The cruciform bandage on the hand was also called the eight-shaped bandage because of its shape. Like other dressings, it begins with a circular round, and then forms a figure eight. Thanks to the imposition of such a bandage, the distal arm becomes completely immobilized. And it is applied like this:
- The skin around the joint is treated with an antiseptic solution to prevent the ingress of pathogenic microorganisms.
- The arm is fixed, and the hand is left to hang freely, as with other dressings.
- The first two fixing turns are made with a bandage around the wrist.
- Next, the bandage is carried diagonally along the rear, moving to the wrist.
- They make a circular tour and return back along the back of the hand to the wrist joint.
- Each subsequent turn of the bandage should half overlap the previous one.
- Thus, several repeated bandages are carried out.
- The bandage ends with fixing coils slightly above the wrist joint.
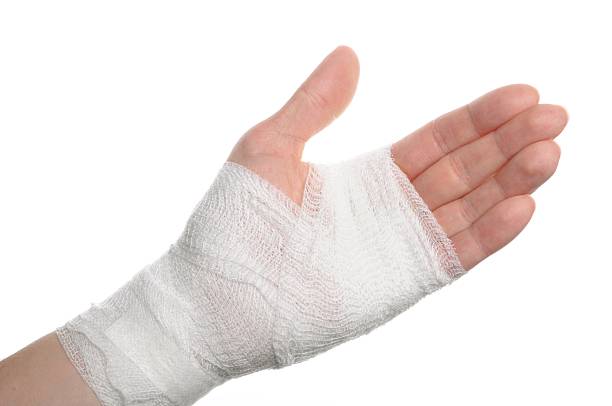
A cruciform bandage is used in such situations:
- with fractures of the bones of the wrist;
- joint;
- pain syndrome when stretching muscles;
- sports injuries;
- pain in the joint due to the development of the inflammatory process or the accumulation of blood in it, which is called hemarthrosis.
First aid for hand burns
The correct application of a bandage for a burn of the hand is a very important step in first aid. After all, a burn is a risk factor for the penetration of pathogenic microorganisms. As a result, the development of infection is possible, which will further aggravate the already serious condition of the patient. This is especially true for burns more difficult than the second degree, which are accompanied by severe damage to the skin.
Dressing such an injury isolates the surface of the skin from the environment, thereby preventing contamination by microorganisms. For the bandage to be effective, you need to follow these rules:
- Before applying the bandage, stop the effect of the etiological factor (hot water, fire, etc.).
- If mittens, gloves are put on the brush, or the burn surface is covered by other elements of clothing, it must be completely released. The bandage is applied only to the skin!
- If a piece of clothing is stuck to the wound, do not tear it off. It is necessary to cut the fabric around as much as possible and bandage over it.
- To anesthetize the damaged area and relieve swelling, it should be cooled. To do this, the brush is substituted under cold running water for 15-20 minutes. This technique will not only reduce pain, but also provide better fixation of the bandage, since swelling will not interfere with application.
- The bandage must completely cover the burn surface, but so that it does not go beyond the edges of the wound by more than 2 cm.
Information on the main types of hand bandages that are used for burns are presented in the table below.
| Bandage type | Peculiarities |
| aseptic | Used for emergency care. For dressing, you can use a sterile bandage, a clean cotton cloth, a diaper, and even a clean bag. They can be dry or soaked in an antiseptic solution. As an antiseptic, you can use ethyl alcohol, tincture of calendula or hawthorn, strong alcoholic drinks (vodka, cognac), potassium permanganate solution. The purpose of applying this dressing is to isolate the wound surface from the environment. |
| Mazeva | To make an ointment bandage on their own, they take a medicine, cover the wound with it, and put a bandage on top. It is best to use Panthenol or Levomekol for this. You can buy a ready-made ointment bandage at a pharmacy. In this case, the medicine is already applied to the dressing. The most common types are "Vascopran", "Branolind" |
| Wet | This type of dressing is used to dress burns of the second, third or fourth degree. If the burn is complicated by a purulent process, solutions of furacilin, chlorhexidine or boric acid are used. These substances have antiseptic properties. If the victim has a third-degree burn on which a scab has formed, use a wet-drying type of dressing with an antiseptic solution. This provides protection against bacteria and promotes faster drying of the wound. |
| Hydrogel | This type of bandage is the most modern in the treatment of burns. Ready-made dressings are sold in a pharmacy. There are three types of hydrogel dressings:
Dressings of this type have a complex effect: they reduce the severity of pain, protect against microbes, cool the burned area, and clean it from pieces of necrotic tissue. |
The choice of the necessary dressing should be carried out strictly individually, depending on the type of damage and its severity. But in any case, applying a bandage is an effective way to immobilize an injured limb and prevent infection from entering the wound.